Behind again with everything but thank you muchly for tin comments. I fear that from next week onwards I should (in theory) have an even lower presence in the ether as life ramps up the busyness stakes. Sorry if it seems very arrogant to be posting posts but not replying - that is not the intention.
This might not be your best option but I thought that I would try and put some sort of tutorial together for making a purse of your own design. I use the term 'tutorial' guardedly - 'tutorial' is a word that has connotations of instruction, learning, skill, deftness, clarity, guidance and 'ta dah'ness' - none of which apply here!
You may regret reading this....
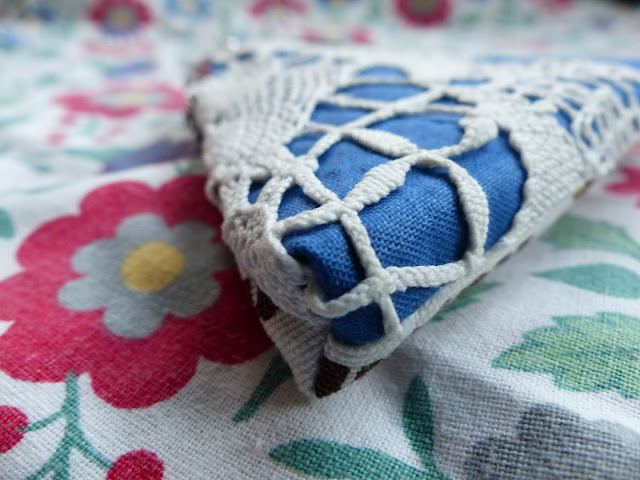
This is my finished version using the free purse frame with Mollie Makes this month.
Inside:
Warning - this is fiddly and the purse is tiny (measures about three inches from tip to toe). Do not make this if you are feeling a bit stressed and grumpy - this WILL NOT MAKE YOU FEEL ANY BETTER!!!!
Making it might make you feel a little bit wor..
First make your template by drawing around the frame - the outer edge of the frame will be your final stitch line. Mark the centre point of the frame and also mark where the bottom edge of the hinge is.
Like this:
Your drawing will not be wobbly like mine
I have inserted the protractor as an afterthought (to try and fashion some semblance of symmetry....can you see that I have NOT created a 60 degree angle). Basically consider how long/big you wish your purse to be and drop a line from the frame to suit (that said TRY and keep a sense of proportion - it would be daft to have a suitcase-sized purse on a frame like this!!!!!). I have folded my piece of paper in half to ensure that both sides are the same!
Cut out your paper pattern - marking the centre and those hinge marks that you made previously.
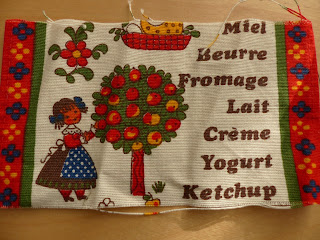
Choose your fabric - this is a teeny tiny scrap (leftover from making dinner-money purses for Bronte and Maille).
Evidence of pre-made purses (I note from the photograph I made these two years ago...best keep the scraps for a while)
Note how I am encouraging 'cidre' purchase by children!!!!
It was barely enough....I think that you can tell....
Interface your fabric if you wish something less floppy. Make the same for the reverse (I was not too happy with the back so not shown this bit off!) and pin right sides together. I have put the pins in where the sewing needs to start and stop (basically you are only going to sew the bottom half at the moment).
Your sewing will start just below the hinge line and follow round until you meet the other hinge line
Do initial trimming (so that it looks like a Christmas tree)
You can skip this bit - EXTRA FIDDLY AS THIS PURSE IS SMALL - fold seams together, squash and pin. Pluh-eeese make sure your seams are aligned - you bottom will look AWFUL otherwise. NOBODY but NOBODY likes an AWFUL BOTTOM!!
On this scale I used a 1.5 cm stitch across the seam. DO NOT CUT IT OFF YET
Turn back to the right sides and check that YOUR BOTTOM IS ALIGNED.
I WILL NOT BE HELD RESPONSIBLE IF YOU DO NOT CHECK.
BOTTOMS SHOULD ALWAYS BE ALIGNED.
Double checking alignment.
Phew.
I am indeed aligned
Now you can safely snip the snips and turn it inside out (so the right sides are now showing)
Choose your lining fabric - to be honest all of this was a bit of a rushed choice as the light was fading and I knew that I really had to start getting the dinner on.
This was an old sheet
Cut just the same as the outer pieces.
Sew as before BUT this time leave the section at the bottom free as this you will need to enable turning inside out at the end.
You will be swearing if you forget and merrily sew right through.
I have done that once or twice....AHEM!
Extra fiddle faddle as you now put the outside pieces inside the lining - but ensure that this is inserted so the inside and outside 'shells' have fabrics RIGHT SIDES TOGETHER.
I am sorry that I am shouting so much but I am merely reflecting REAL LIFE
If children are in the vicinity just keep smiling sweetly, pretend that everything is going swimmingly and just as you planned.
"Sewing this small size is a real treat" !!!!!!
"I really must sew in miniature more often"
"...it is a real joy so to do..."
I have swapped to a zipper foot in order to try and see what $^"$%£ I am doing at this point. To be honest this bit is mainly done by sense of touch (don't laugh - this is true). Not only are my glasses USELESS (and I did go to SPECSAVERS) but the sewing machine is USELESS too. A double whammy which means the sense of touch goes into overdrive - and the light was fading don't forget (light on sewing machine is no better than a lit match!)
"Bronte come and hold this lit match...do not roll your eyes and do not ask why"
The top raw edges are now all that remain to sew - and this sewing needs to butt up against the sewing that you did previously. Try not shout at the children at this point - it is not their fault that the matches burn down so quickly. So sew (so sew!!! sounds like a song!) along the top edges CAREFULLY. All should be well because at least YOUR BOTTOM IS ALIGNED AND THAT IS WHAT REALLY COUNTS
Trim like Billy O - going as close to the wind (aka seam) as you dare - try and debulk (I have been trying to do that for years....) as much as possible.
Because you remembered to leave open the bottom seam of the lining you can now shove the outer pieces through that gap. You did leave that open didn't you.....you didn't...cripes...you are in a pickle....
Please note that the pen mark on the ruler was NOT created by my good self but some soul many years previously. It was as though s/he knew that several decades later some poor old woman with dodgy eyes would need that EXACT mark.
Who knew!
At this juncture I had to stop to get the dinner on - I then forgot to take any glue photographs!
For this frame the glueing is the easy bit - the frame has plenty of space for your sewing. Put your glue inside your frame channel and put in your purse! Do one side at a time and allow about half an hour for each side to dry (I speed this up by putting it in the airing cupboard)
Go on - admire you bottom again - you deserve it
All done
This is the reverse that I was not tooooo happy with
I will show a little bit more...
Showing my large thumb in order to gauge the scale of this thing!
Neither use nor ornament....
I you do make one please let me know.
"Funnily enough Jenny you have put us right off....."
Bottoms Up
PS: This is the link to the purse that I made a couple of years ago from the last time MM had a free gift! This was a Christmas version here: Another Mollie Makes purse
Disclaimer: 'I hereby refute all claims of injury, relationship rift, arguments, rows, emotional distress and match burns that this 'tutorial' may engender. I am not liable for any purse malfunction, financial loss, BOTTOM MISALIGNMENT or disfigurement of any kind'


